

| Device in Jar. Greenhouse. | |
|
Monday, April 12 2010, 01:30 Category: Hardware, Tags: atmega freak growing |
Overview
This is a controller to grow plants. Features:- The lamps are on/off for day/night.
- Different time of dawn for weekdays/weekend. Thus, the light works as an alarm.
- The day length is determined by the settings.
- Temperature control for the ground based on optimal temperatures.
- The optimal temperature depends on day/night (determined by the settings).
- The time for watering is watched and the special alarm is activated when the watering is required.
- Contactless input, IR sensors.
- Freaky design. :)
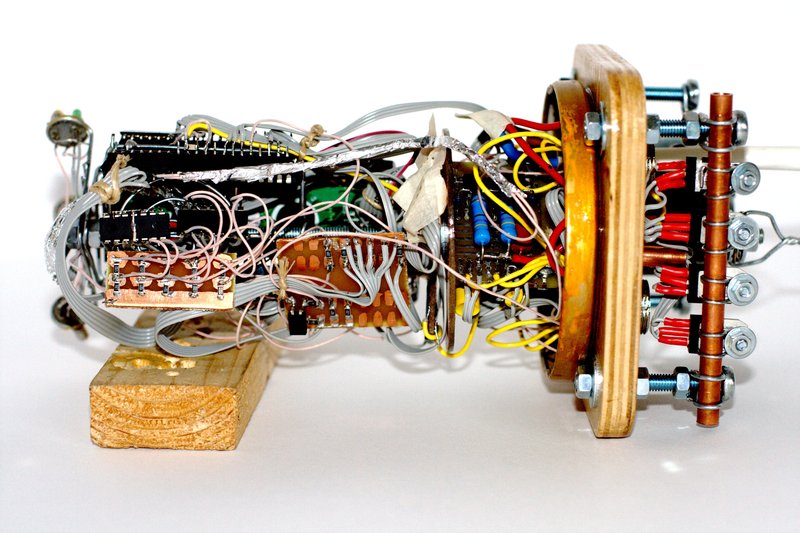
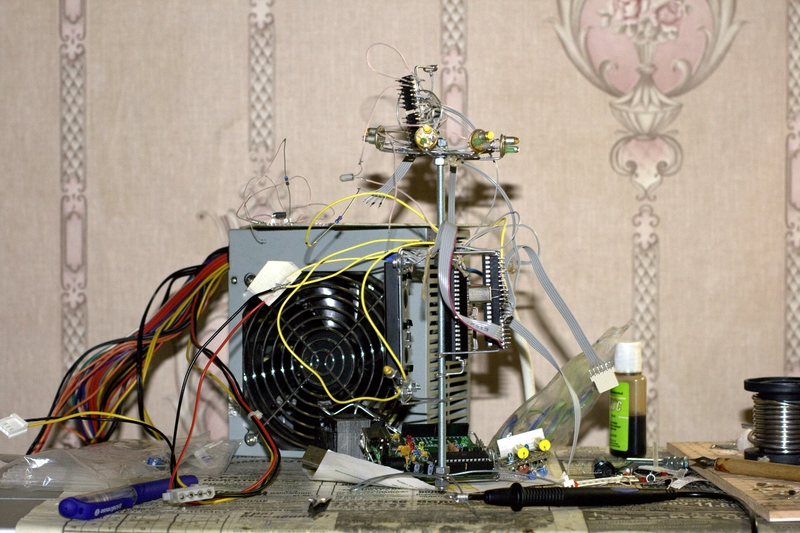
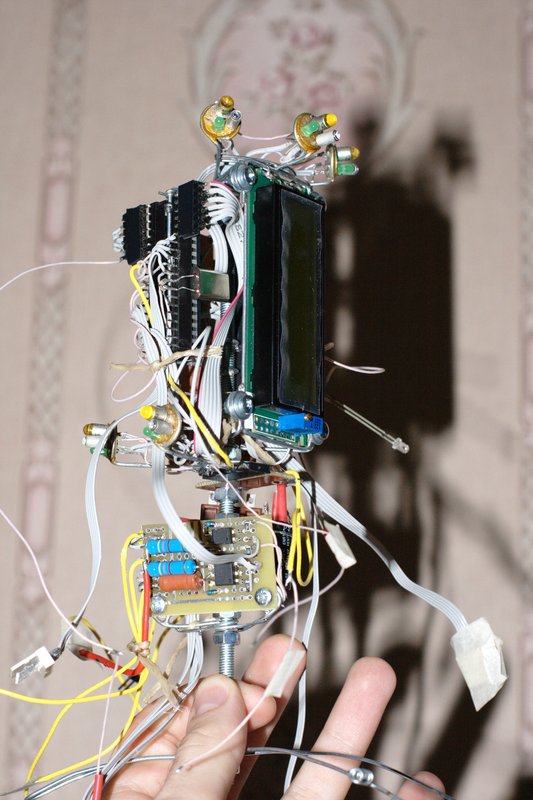
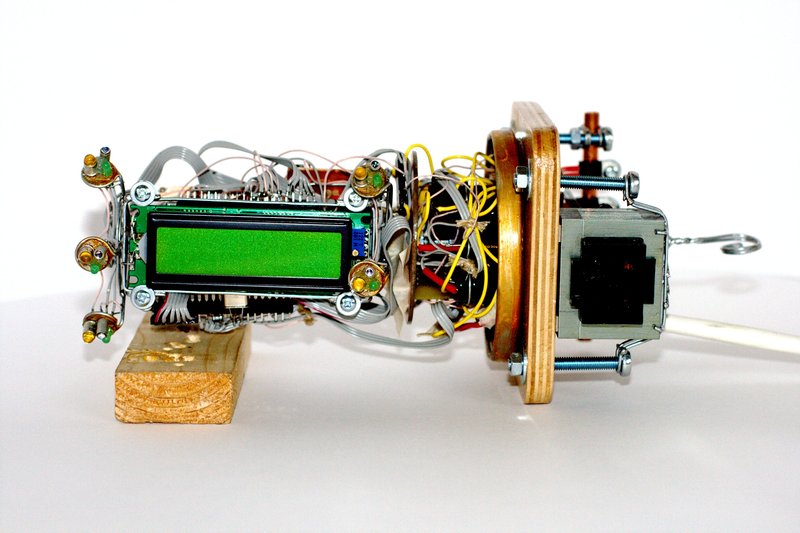
| Without the jar, backside. I tried to reach the 'cyber-punk' shape using only real working components, no embelishments. |
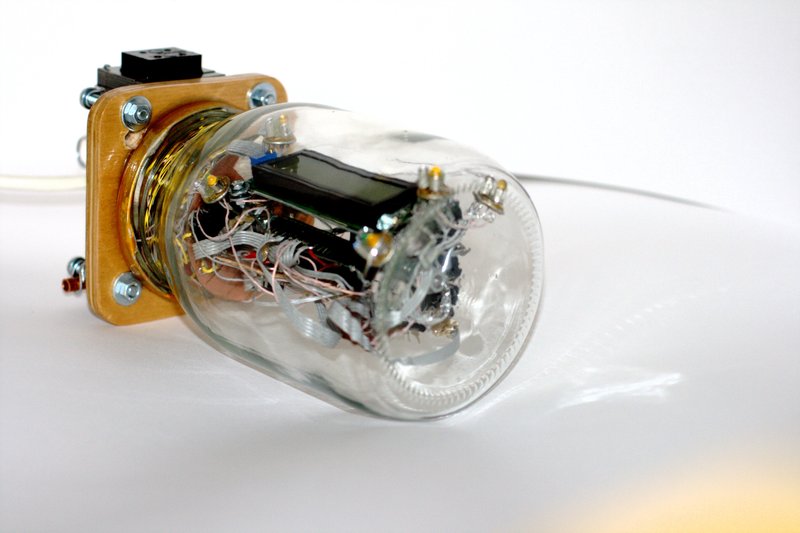
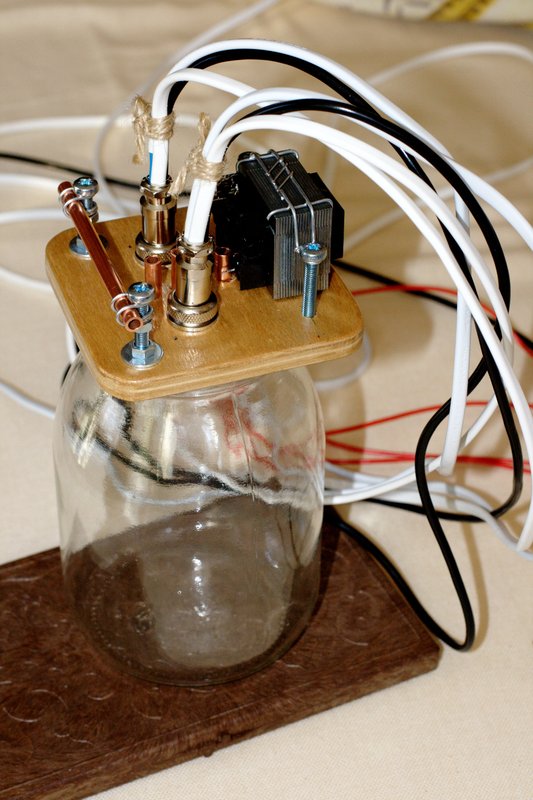
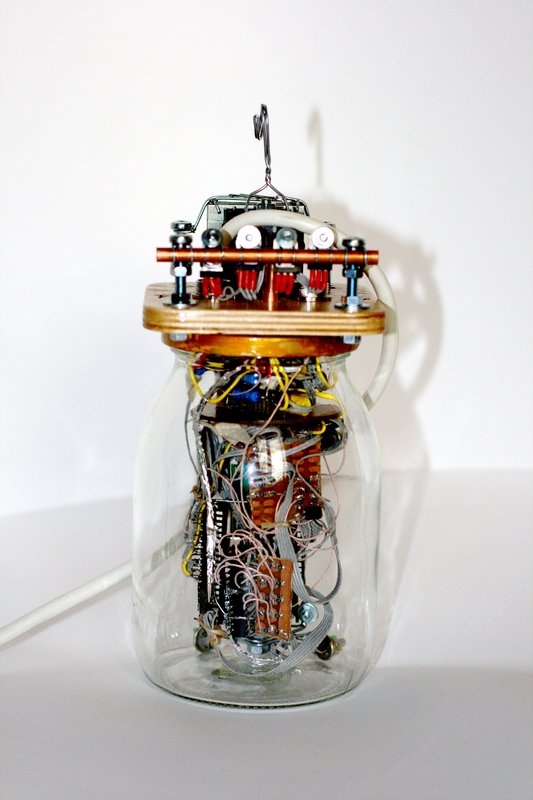
| The jar. |
Why was mentioned & how was done
That idea arose after all my ruined attempts to grow summer flowers at balcony. There were 3 of them, with weak and useless seedlings: that spring was freezing. The last try kicked off late autumn, thanks to my friend looking after that when I was out to my holiday. :)
So, I had decided to cheat the evil mother nature and to grow anything in any season. Indeed, the idea is not all that fresh: you can buy cheap devices. The question was that I wanted the mine one, with some odd details, a special design. Moreover, I love all that chips and wires. It took me for 6 months of hard work. Lots of time, I know.But there were lots of issues to do:
- Learning principles of the growing: light, possible lamps, etc.
- Learning MPU in common.
- Learning Arduino, then Atmega32 (when I refused to use Arduino).
- All that stuff was unknown to me before: TWI, LCD controlling, linear regulators to make a power supply, etc.
- Experiments on IR sensors & LED's to make buttons. Develop on ergonomics & principles of the user interface.
Oh, nearly forget: the other goals of that device are:
- Effective & soft alarm. I am early riser, so should wake up early. But it is easy to shut down a noising and irritating alarm. Then, the day light is the best way to wake up. It is a problem in my city of Saint Petersburg with its very short days in winter (it is why I am sure about using the light as a alarm: I can easily wake up at 6:00 in summer and want do not wake up in winter at all).
- That is amazing to have such a special lamp with summer plants. Particularly, in winter. Particularly, if it is -20°C outside.
Jar
Why not? :) The ordinary plastic boxes scare me by their boring colors, forms, etc. They are so flat, so usual, that any idea would be spoiled if just pushed into some of that. In addition, their prices are inadequate (whereas my jar was 50 rubles, <$2, together with a peach compote). Then, its appearance. I would like to develop the idea of old devices, where the parts & wires determine its appearance without any artificial covers and boxes: no artificial and useless things, only the machine. A kind if reverse to the most things of the steam punk style, where senseless parts are combined to bring some 'hi-tech' appearance for a useless thing. The other thing is that almost no plated circuits were used (only for a numerous SMD resistors). The reasons were:
- All DIP components are easily connected to their pins directly.
- Plates take some space.
- They are not transparent. A kind of beauty goes from the transparency of the device, when wires curled around and the 'heart' lights them from inside.
- Their etching is boring and assumes some finally decided circuits, no experiments. Meanwhile, I do not have even a sketch of the circuits: they are simple enough and were changed time to time.
Emulation of climate
Supposedly, if you want your seeds to arise, you should emulate real nature, real weather for the time of year and the climate where your plants live normally. These rules depend on a species: some of them can arise if nights are cold enough, some arise if day is increasing (supposedly; I am not a botanist). Therefore, temperature and day length should vary. I can not heat the air, so try to heat the ground (it should work).
Buttons
Nope, they are no buttons. I am showing off with that IR sensors. And it is handy for devices put into jars. Its glass is transparent, you know. There is some awesome example proofing that IR buttons are easy to do. But this guy used powerful (=costly) IR sensors without additional parts. I decided to use cheap sensors with cheap op amps.
It is better to say that there buttons were the most (and too big) part of work. It is handmade, has different angles, not very good algorithm and these old IR-sensors are nice, but very noisy. For sure, I would recommend to use either ready IR-sensors or to spend big time to investigate this area in details (if, of course, you want to spend this time).
This work was not even long, but very boring. You know, it is a trouble to manage to use non-linear IR LED's, non-linear sensors, not very balanced amplifier and trying to catch it by an easy algorithm. For example, my buttons can wrongly blink in the nights and are hard to use when the light is bright.
Luminous lamps VS powerful LED's
I just wonder about all that adverts about LED lamps, about its ecological benefits, etc. Something was wrong about all these happy dreams. Finally, I have found some analysis in Internet similar to my opinion. This final opinion is that LED will, maybe, something worth in the future, but they are an incredibly expensive without any benefits today:- They glow. Just look at radiators of powerful LED's. The silent proof.
- Their excellent lightning characteristics are real for about 20°C. Look at their radiators again. That is fun.
- The Price. >8-[ + ]. They would cost 10 times more for me.
- Their limited lifetime.
- One needs tens of LED's to substitute one luminous lamp. This is an argument for handmade lamps, of course.
- They have very narrow rays. Some lenses can be used to spread the light on plants evenly (though, I do not want to enjoy with all that stuff). But anyway, I would like to light the entire my room with that lamps, not the plants only.
Sodium lamps are the best to grow, but are not suitable to
light a living room. So, I have 2 simultaneously controlled luminous
lamps, 40W each. It should be enough.
Heaters
I could not find any appropriate ready heater (low-power, small, watertight, cheap), so I used powerful resistors on a iron plate. Resistors are glued to the plate with a heat-resistant clue, all contacts are hidden with heat-shrinkage insulation, then the construction is covered with heat-resistant paint. This paint protects contacts from shortage and the plate from rusting.
Each plate has 2 chains of 7 resistors (560Ohm 5W) each. So, the plate produces 24W (Russia uses 220V). The first try (~10W) was not enough to heat a pot (550*150*150cm) from 18°C (air temperature) to 35°C (quite reasonable order, I suppose). On the other hand, the heater should be low-power for not to burn roots. This solution costs around 300 rubles ($10) and gives 24W. The most cheap & low-power ready solution found by me was a heating bent: $30 & 160W (that is too much).
Up to date, I can say that the game is not worth the candle: even though all that found ready heaters are quite powerful (160W, at least), I could use them in some pulse mode (switching them on/off to keep an appropriate temperature during heating). All that actions passed by me were boring: get resistors, stick them to the plate, solder wires, painting, etc.
Notes
- You know what really mean almost all articles about 'automatic greenhouse' placed in Internet. And no, I have no plans to grow cannabis.
- Sorry for my English. :)
Technical details: hardware
Just some facts:- The master MPU is Atmega32L with 16MHz crystal.
- The slave MPU is Atmega8L with 8MHz by its internal oscillator. It is controlled via TWI(I2C) and is used as a PWM generator for LED's.
- Power supply is done with a transformer.
- The +5v is controlled via M7805 linear regulator.
- Signals from IR sensors are amplified by lm224 (two chips).
- Overall current consumption of the device is 140..150mA.
- Powerful triacs use BTA04.
Technical details: software
Some facts, too:- I used KontrollerLab to write & compile sources.
- I used the LCD library of Peter Fleury. The only changes disabled usage of RW signal, so I had 1 pin free.
- The TWI library is handmade.
- The binary code for Atmega32 is 9662 bytes.
- The structure of code is scalable and easy to modify because of the used ideology: objects interchanging messages. There are 2 categories of objects:
- Data storage. They collect some information useful for other objects and generate events when their content is changed.
- Subsystem. They implement some logic, controlling, etc. For example, WateringSubsystem controls the watering process: it watched the time, generates its signal 'watering is needed', etc.
- Apart from objects mentioned above, there are low-level objects:
- Timer. Generates low-level event '40ms elapsed'.
- Events controller. It is where events are distributed to objects.
- ADC controller.
All pictures. From start to end.
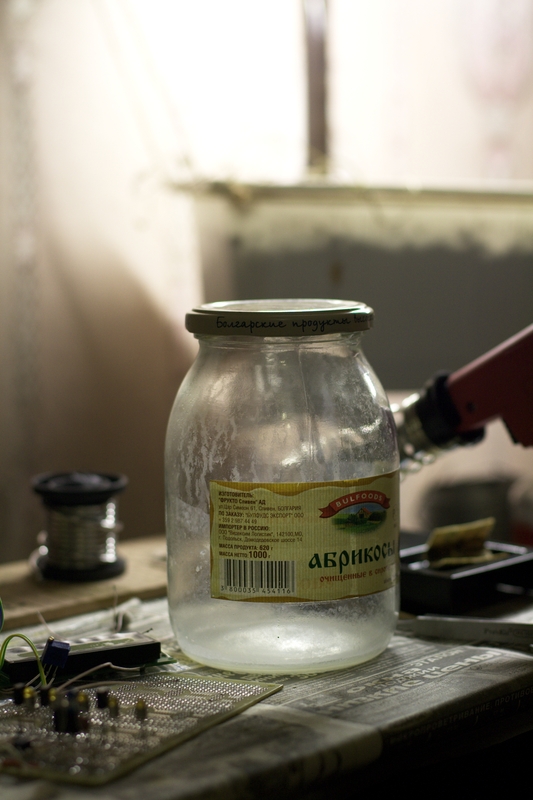
| A jar for peach compote! 26th of November 2009. |
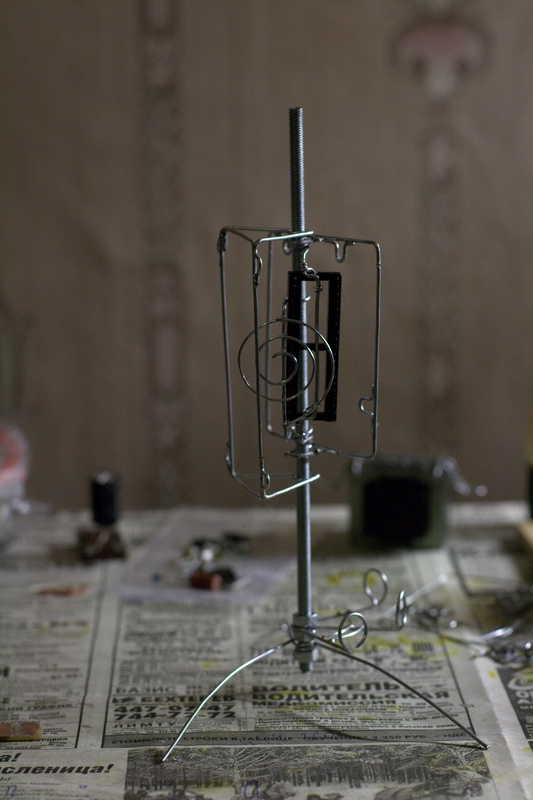
| Almost empty rod. |
| First blocks, buttons. You can see the Freeduino boards that would put away later. |
| |
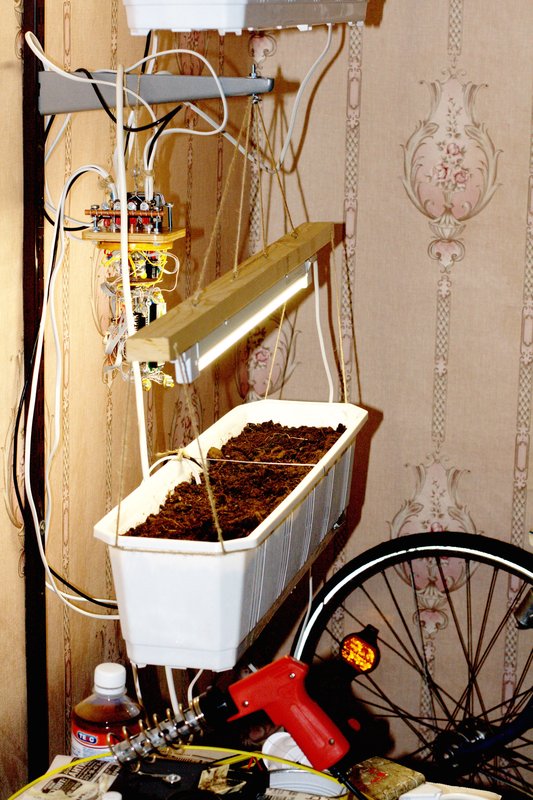
| Wooden top. Jacks for flower pots, etc. |
| |
| |
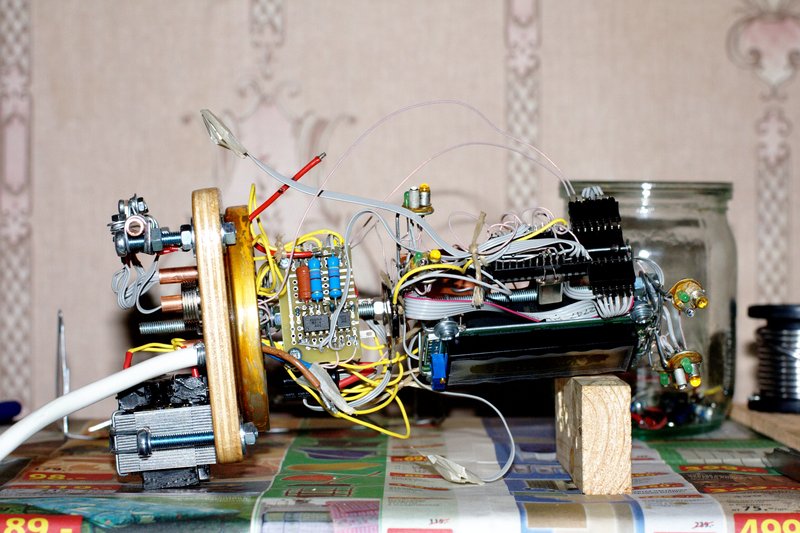
| All parts are linked together. |

| |
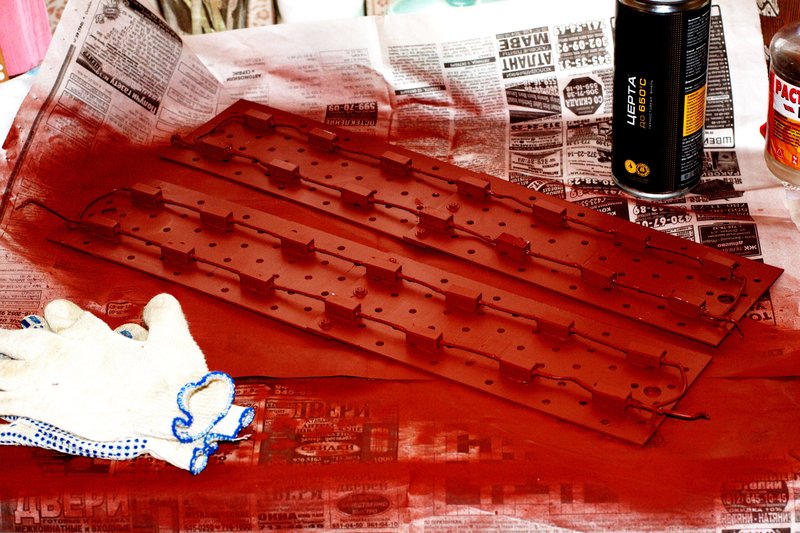
| Heater for ground. |
| Testing without the jar. I did not faced yet to the big problem with IR sensors (glass of jar frustrated the monitoring). |
|
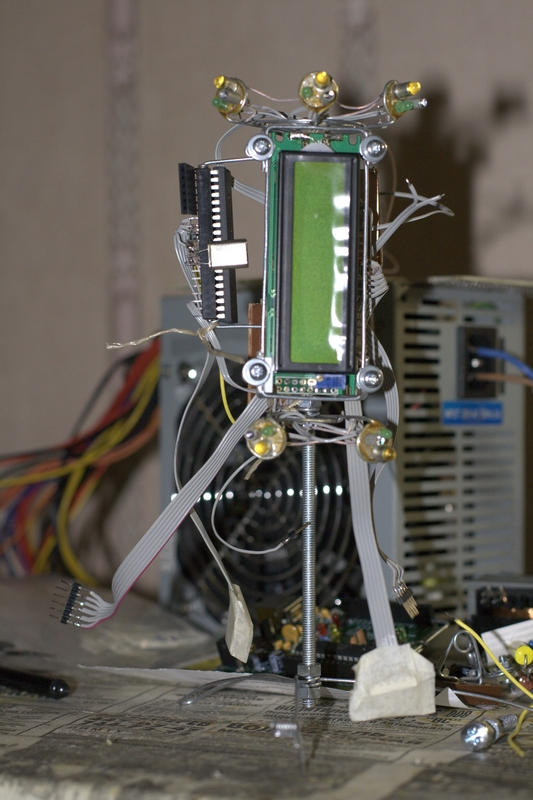
| Exactly what I would like it to be. Something around cyberpunk. The important point is that there are no artificial embellishment, only parts of the device. |
| |
|
| Yeah! :) |
| 11th of April 2010. |
Video
| Overview. | |
| The user interface: display, operating IR buttons. |